
As always, our waterproofing work is performed by an expertly trained and experienced crew. It is quick, clean and safe. Completed on time. And done right. That’s how we make it easy on your home. And you.
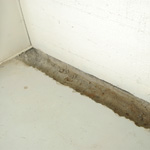
Excavation
First, we break through the concrete in the repair areas and remove any debris. The breakout is no wider than 6”–8” in most cases. We then dig down to the footer.
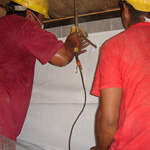
Drilling
Next, we’ll drill weep holes in block walls as needed. This allows water that enters the voids in the bricks to drain into the Water Lock™ Plus System.
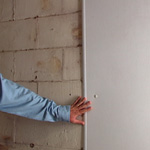
Protecting
The optional Wall Shield™ moisture barrier provides another layer of protection and adds a finishing touch to your basement.
Installing the Water Lock™ Plus Pipe
Next, we install the dual chamber Water Lock™ Plus pipe. The high flow core ensures long-term performance.
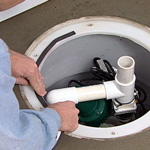
Installing the Sump Pump or Gravity Drain
Your Water Lock™ Plus technician will then install a sump pump or gravity drain if needed. The sump pump lid fits flush with the floor. We also recommend a battery backup system to ensure optimal performance.
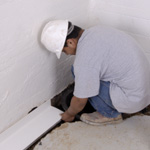
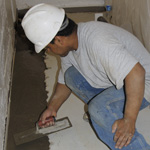
Replace Concrete
Upon completion of installing the Water Lock™ Plus pipe, the concrete is replaced. Then, we’ll tidy up.
Basement Waterproofing Installation – How it Works
The entire process only takes one or two days in most cases.